Activity Idea: Weaving with Art and Math (Quick Tip)
Looking questions
Weaving is the interlacing of 2 sets of fibers. Look closely at what you are wearing to see what criss-cross patterns you can find. Have students examine each other’s clothes to see if they can identify other patterns.
Examine Man’s Cloth in the Darkoro Yesre (“Certainly One Day You Will Laugh”) Pattern. Can you find horizontal and vertical bands of color? Kente cloth is made of narrow woven strips sewn together to produce a large cloth. What patterns do you see? Can you find a pyramid design repeated in gold and red? This design is known as kuduo. It takes its names from the small pyramids used on the lids of ritual vessels.
Making your own loom
Weaving is done on a device called a loom. You can make your own loom at home or in the classroom with a wooden frame, a scrap of cardboard, or even twigs. To make one from a piece of cardboard, cut notches at the top and bottom 1/4” into the cardboard with a pair of scissors. The further apart your notches are, the wider the strands will be holding the weaving together. Consider 1/2” notches for younger students and 1/4” notches for high school students. Then, wrap one long strand of yarn around the cardboard loom into the notches and use another strand of yarn to weave.
Here’s a fun video to see cardboard weaving in action.
Weaving art and math together!
Think of a weaving as a grid. The horizontal and vertical fibers could be compared to the X and Y axis of a coordinate grid. The horizontal fibers, the weft, run along the x axis. The vertical fibers, the warp, run along the Y axis. One way to remember this by thinking “warp speed ahead” or “weft and wight” like the cartoon character Elmer Fudd.
Artists often think of their weavings as a grid to plan how to create tapestries and other images on their weaving. Have students draw a square or rectangle on graph paper. Color the shape one color and the background another. Have students identify the coordinates of their shape and use the graph to create a woven tapestry. Tape the graph to a piece of cardboard and cut notches for the Y axis at the top and bottom of the piece of cardboard. Wind one long piece of yarn into each notch from top to bottom. Students can then weave the colored shape on their grid paper with one color yarn and the background with another color.
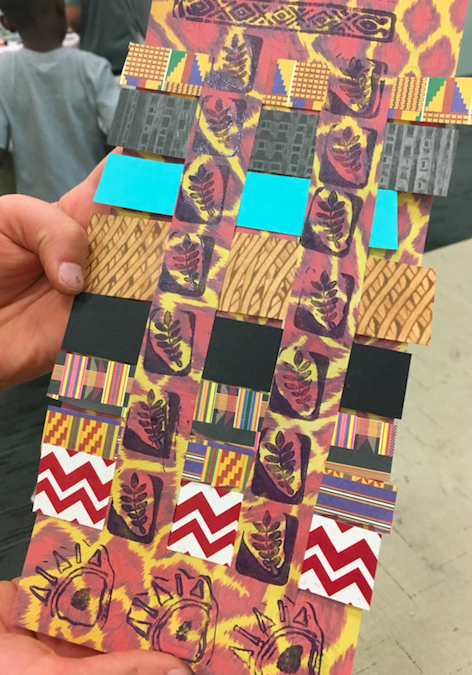
Paper Weaving
Use one piece of paper as your loom and warp and then cut strips of paper for the weft. Begin by measuring one inch increments at the top and bottom of a piece of colored construction paper. Create a border at the top one inch down. Then, cut along the stripes of paper until you get to the border as if it is one long paper fringe. Have a variety of papers already cut into one inch strips for the weft.
Have students weave the strips over and under. Try using different kinds of paper or images from magazines for a creative alternative!
Patterns in Paper Weaving
Have students create patterns by changing the number of strands. Number the strips of paper on the warp paper with the kind of pattern you want to create.
For instance, a simple tabby weaving would be (1, 3) and then (2, 4). For a tabby weave, raise all of the 1 and 3 warp strips in the first row and then raise all 2, 4 in the second row. Then, repeat.
Here are other patterns you can try:
Old Rib (1, 2) (3, 4)
Broken Twill (1, 2) (2, 3) (1, 4) (3, 4)
3 and 1 Rib (1, 2, 3) (4)