Rodin’s Lost-Wax Casting Process (Story)
Rodin’s Lost-Wax Casting Process
Using maquettes, or small-scale models of unfinished sculptures, and detailed descriptions, an in-gallery display illustrates Rodin’s “Lost-Wax Casting Process,” a time-consuming and painstaking journey from plaster model to impression to wax to granulated ceramic model to completed bronze sculpture. See each of the steps below and then visit the Museum to see the whole process!
Step 1 - Rodin’s Lost-Wax Casting Process
Step 2 - Rodin’s Lost-Wax Casting Process
Step 3 - Rodin’s Lost-Wax Casting Process
Step 4 - Rodin’s Lost-Wax Casting Process
Step 5 - Rodin’s Lost-Wax Casting Process

Step 6 - Rodin’s Lost-Wax Casting Process
Step 7 - Rodin’s Lost-Wax Casting Process

Step 9 - Rodin’s Lost-Wax Casting Process
Step 10 - Rodin’s Lost-Wax Casting Process
Step 11 - Rodin’s Lost-Wax Casting Process
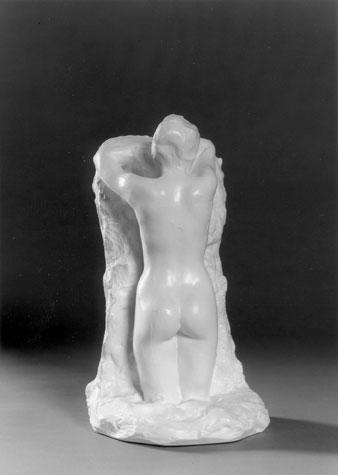
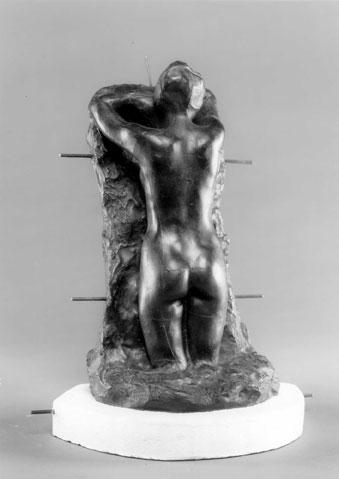
Step 1
One of the most common casting methods that Rodin used was the cire-perdu (or lost-wax) process. Although expensive and time consuming, this method allows artists to accurately reproduce the delicate nuances of an original model.
The sculptor first creates a model, generally made of plaster or clay, and turns it over to a foundry, where it will be cast in bronze.
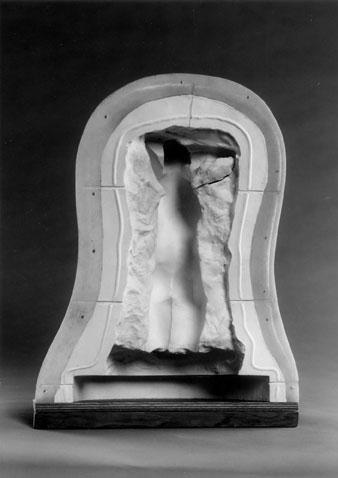
Step 2
A foundry assistant puts the model into a bed (with a front and back, like a clamshell) of very fine malleable material held in place by a rigid outer casing. When the assistant removes the model, its impression remains.
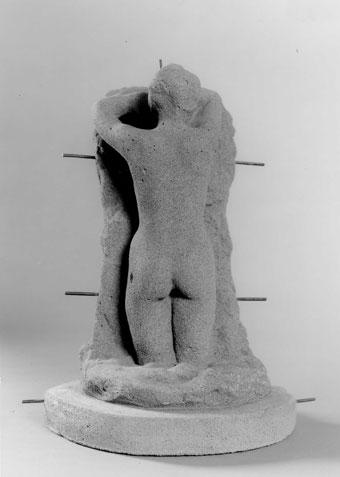
Step 3
The assistant carefully puts fireproof clay into the impression, creating a sharply defined duplicate of the front and back of the original model.
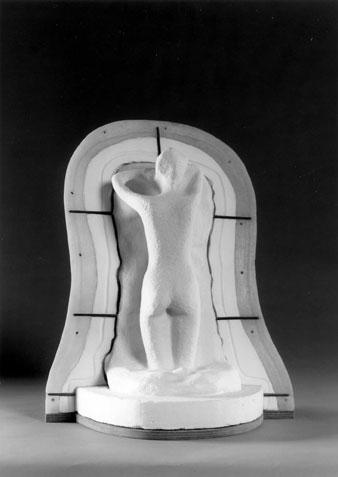
Step 4
A thin layer of the surface of the clay model is scraped away, and a protective white coating is applied. When this core model is returned to the mold, it is held in place with pins so there is a gap between the model and the mold. In the next step, the assistant will pour hot wax into this gap.
Step 5
After closing the clamshell mold around the clay model, the assistant pours hot wax into the gap between the model and the mold. This produces a clay model covered in wax.
Step 6
Next a network of pipes is attached to the wax-covered model. (These pipes will act as conduits that later allow heated wax to flow out of the model and molten bronze to flow in evenly, replacing the wax.)
Step 7
A finely granulated ceramic coating is applied to the surface of the wax model and its pipes until it becomes thick and coarse. The result, called an “investment mold,” is then dried and heated. The heat causes the wax to melt and flow out of the mold via the pipes, leaving a space between the fire-resistant clay model and the investment mold.
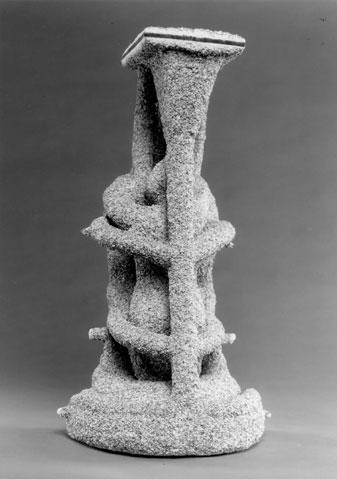
Step 8
The assistant reinforces and covers the investment mold with a heavy, heat-resistant “cement.” Once dry, this outer cement dome and inner investment mold are heated to a high temperature (over 1,000 degrees Fahrenheit) so they won’t crack when molten bronze is poured into the investment mold.
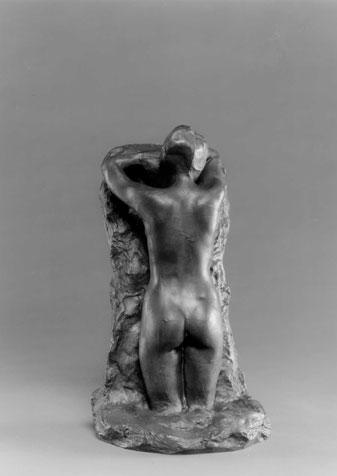
Step 9
Molten bronze (over 2,000 degrees Fahrenheit) is poured into the investment mold, filling the space left by the lost wax. When the bronze has cooled and hardened, the assistant breaks the dome and mold, and the bronze sculpture appears.
Step 10
The pipes are removed so that no trace of them can be seen. This procedure of hand finishing the bronze to perfection is called chasing.
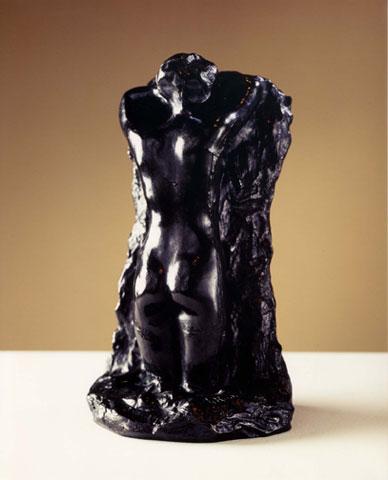
Step 11
After chasing, the assistant applies certain chemicals to the bronze surface of the sculpture, creating a thin patina (usually brown, green, or black, depending on the chemicals used), which is then buffed.