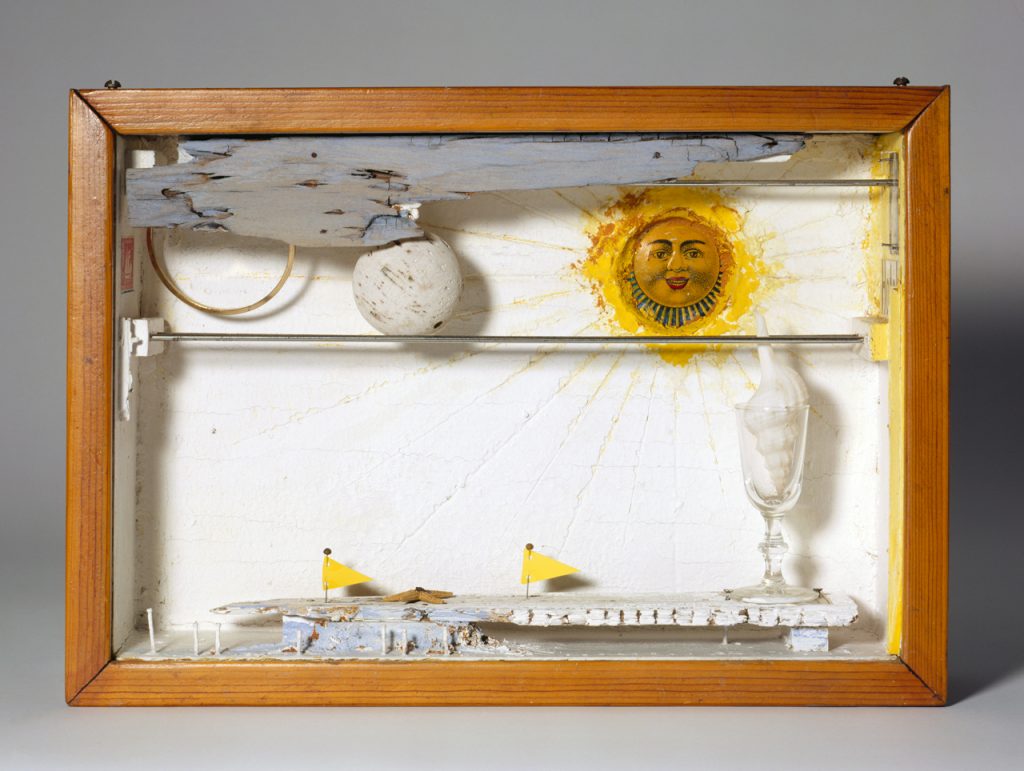
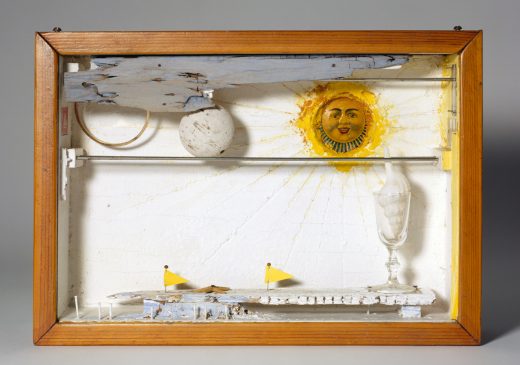
3-D Landscapes (lesson plan)

Abstract

This lesson will focus on using found & recycled objects to create a three-dimensional narrative landscape.

Grade Levels
Pre-K
Subject Areas
Science, Visual Arts
Concepts
Place, Play
NC Standards Correlations
Visual Arts
Cognitive Development
CD-5
Science
Cognitive Development
CD-14, CD-15

Artwork Related to this Lesson

  • Suzy’s Sun (for Judy Tyler)

    Suzy’s Sun (for Judy Tyler), by Joseph Cornell

    learn more

Student Learning Objectives

  1. Use recycled and found objects as symbols to communicate qualities of a real place.
  2. Create a landscape that resembles a real place.
  3. Begin to understand elements of perspective by positioning objects relative to where they would be placed in a landscape (clouds up top, grass on the bottom).
Use left and right arrows to navigate between tabs.

Activities

Prep

  • Fill tubs with an assortment of objects.
  • There should be enough objects so that each table of four students has its own tub.
  • Make sure boxes are stable and can stand up on one side, providing a landscape (horizontal) view.
  • Make a bowl of construction paper scraps for each work area.

Set Up

  • Cover tables with butcher paper.
  • Place tubs of objects on tables.
  • Place a bottle of nontoxic glue at each student’s spot.
  • Set aside the bowls of construction paper scraps for after students have finished gluing their objects in place.

Introduction/ Warm-Up

  1. Introduce Joseph Cornell’s Suzy’s Sun (For Judy Tyler) to the students. Tell students that the artwork is called Suzy’s Sun. Ask, Why do you think the artist gave the sculpture this name?
  2. Talk about how parts of the artwork look like or relate to a real place (e.g., beach), even though the artist did not sculpt a real landscape. Ask the class to discuss which parts look real and which parts do not. What kind of place do you think this shows? Ask students to be art detectives and look for clues in the sculpture that can help them figure this out.
  3. Discuss how the clues the students found (the sun, the flags, the shell) are symbols. A symbol is something that represents an idea. What do the students think these things represent in Suzy’s Sun? Discuss.
  4. Discuss how the artist chose to make his sculpture from objects he found. He carefully arranged these objects in the box until he created a special place.

Focus Activity Procedure

  1. Explain that the students are going to create their own sculptures out of found objects. They will also include clues and symbols to help their classmates figure out where their special place is. The students should first think of the place they would like to create (mountains, beach, forest).
  2. To begin their sculptures, students select only three objects at a time from the tubs of found objects on their tables.
  3. Demonstrate how to arrange their objects, and glue them on to their box. Ask students to think about placement and relative position. Where would the sun go? Would it go toward the top of their box or toward the bottom of the box? Where is the sun when we look outside? Is it up high or down low? Where would a tree be glued?
  4. Students should think about symbols and how every found object will be a symbol for something else. For example, a bottle cap could be a symbol for a sun. A twisty tie could be a symbol for a tree branch. A plastic bottle could be a symbol for a lake.
  5. Excuse students to get to work. Circulate through classroom to assist and talk with students about their projects.
  6. After the students have finished gluing their found objects, they can add construction paper scraps for more detail.

Closing

  1. Clean up.
  2. Gather class for closing conversation.
  3. Set boxes on a table and take a gallery walk.
  4. Have students describe what is happening in their scenes and what symbols they included (for example, the bottle cap is a symbol for the sun). Ask if students can guess what symbols might represent in each other’s sculptures.
  5. Ask students to look for art all around them at home and at school.

Written by Andrea Saenz Williams

Assessments

1. To assess student understanding of symbolism, ask students to tell you about their work and record narration (this might be displayed with artwork).

2. Observe the work created by students and assess if it meets criteria of resembling:

  • the place discussed as a class
  • the type of weather discussed
  • the place narrated by the student (see assessment 1)

3. Discuss with student positioning of objects in their work and their understanding of that positioning (example student statement: “I put the clouds up high. Clouds are in the sky.”) Observe if spatial positions of objects are in logical placement.

Lesson Resources

Vocabulary

recycled

landscape

Materials

shoeboxes, cereal boxes, or other small boxes (collect in advance of project)

small found objects and recycled objects

natural objects to incorporate (leaves, sticks) *these could be collected by students in advance

nontoxic tacky glue

construction paper scraps in assorted “landscape” colors

cotton balls (for clouds)

Extension Activities for Teachers

  • Begin a recycling station in the classroom. Designate a recycling captain to help keep the station organized.
  • Encourage students to recycle at home and bring interesting objects to school to be used in art.
  • Use tempera paint to paint the exterior and selected portions of the interior of the finished boxes.

Extension Activities for Families

  • Set up scenes with your toys and have family members guess what is happening. Do the same thing using objects found around the house or from the recycling bin. What can you make out of things you find outside? What can a rock be? Or a twisty stick?


Related Content