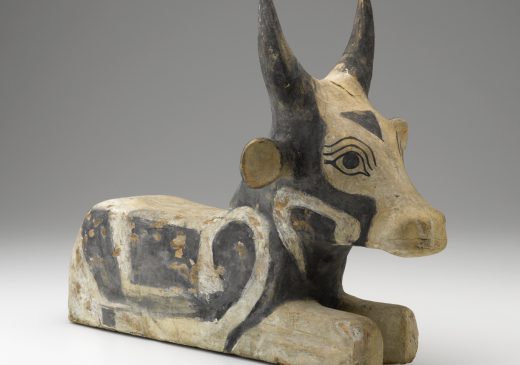
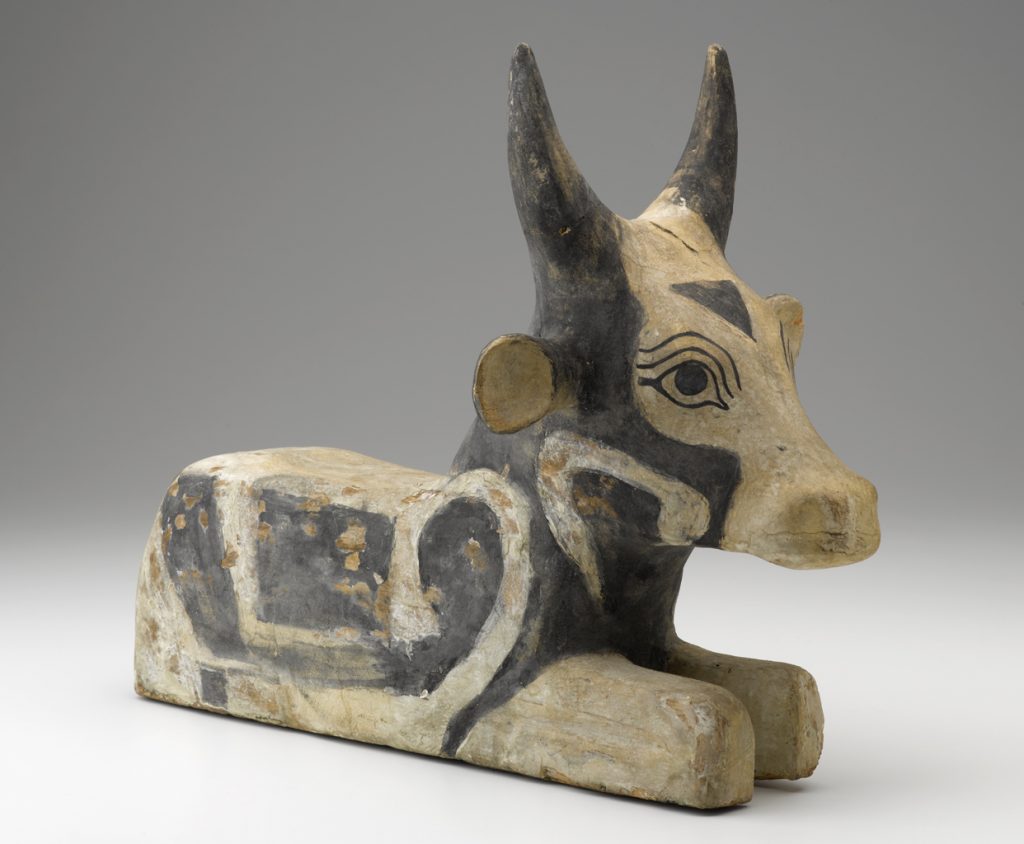
Wooden Animal Sculptures (lesson plan)

Abstract

This lesson will focus on creating an animal sculpture from wood scraps.

Grade Levels
Pre-K
Subject Areas
Math, Visual Arts
Concepts
Problem Solving
NC Standards Correlations
Visual Arts
Cognitive Development
CD-4, CD-5
Math
Cognitive Development
CD-12

Artwork Related to this Lesson

Student Learning Objectives

  1. Learn how to create a sculpture using wood blocks.
  2. Begin to understand how shapes can fit together to create their animal (understand spatial relationships).
  3. Describe the basic shapes that make up an animal.
Use left and right arrows to navigate between tabs.

Activities

Introduction/ Warm-Up

  1. Begin with conversation about the sculpture Reclining Bull.
  2. Ask students to point out the shapes they see in the sculpture.
  3. Ask students if they think the animal is standing, sitting, or lying down. Say that the title of the sculpture is Reclining Bull. The word recline means to lie back. Ask students if they can practice reclining.
  4. Tell students that the sculpture was made long ago in a faraway place across the ocean (a country called Egypt). Ask if students have ever heard of Egypt. You may want to make connections to things students might recognize from Egypt (pyramids, mummies).

Focus Activity Procedure

  1. Show students wood pieces they will use to make their sculpture.
  2. Demonstrate how to select wood pieces for the body, legs, etc. for the animal and how to glue them together. Discuss how the sculpture does not need to look exactly like a real animal, but can look like the “idea” of an animal. Tell students that they will put their animal together until it looks right to them.
  3. Show that a sitting down animal can have legs stuck to the side of the body.
  4. Have paper towels, glue, and small pieces of wood at each table for students to select as needed.
  5. Have a large pile of wood in a bin for students to be allowed to select pieces.
  6. When students are finished, they should leave their sculpture at their table to continue drying, clean up, wash hands, and move to a designated activity.

Closing

  1. Clean up.
  2. Gather class for closing conversation. What type of animal did they sculpt? Is it sitting or reclining? Can they give it a name? What kind of sound does their animal make?
  3. Have an animal parade! Do this by parading students in a gallery walk around the classroom.  Students can make the noise their animal would make as they parade.
  4. Ask students to look for art all around them at home and at school, encourage students to especially look for art that has animals as its subject!

Written by Andrea Saenz Williams

Assessments

Assess student understanding of spatial relationships and parts of their animal during their time working on the sculptures through one-on-one discussion. Circulate and ask:

  • How are you putting your animal together?
  • What parts does your animal have? (head, neck, beak, legs, body, etc.)
  • Can you name some of the shapes in your sculpture? (*If the student is using scraps, many of the shapes may be difficult to name.)

Lesson Resources

Vocabulary

sculpture

Egypt

bull

recline

Materials

Wood scraps in assorted sizes, particularly some 2 x 2” chunks for necks; 2 x 4” pieces for bodies, etc. (wood scraps can be acquired for free at high school and college wood shops, Home Depot, and cabinetry shops)

small wood pieces for details such as eyes and ears (Michaels sells small packets)

nontoxic tacky craft glue (the extra-sticky kind),

butcher paper to protect table or 12 x 18” placemats for students to work on

Extension Activities for Teachers

  • Create a center in classroom focused on animals.
  • Once artwork is dry, have students paint their animal sculpture and add fabric, feathers, or other materials.
  • Have students narrate a story about their animal sculpture.
  • Have students draw a picture depicting them and their animal.
  • Visit a local farm or veterinarian.
  • Ask a veterinarian to give a talk to your class.
  • Have library books available on animals and ancient cultures.
  • Ask students to think of other materials they could use to create a sculpture. Could they use recycled objects? Play doh? Clay? Paper? Other?

Extension Activities for Families

  • Make a sculpture at home from recycled objects and glue.
  • Go on a scavenger hunt around your house to find sculptures.
  • Find the oldest object in your house. Find the newest object in your house.
  • Search for objects at home that came from other countries. What countries did they come from? Have your family members been to those countries? Share stories.
  • As you move around your town or city, look for large sculptures in parks and on streets. What do these sculptures look like?

Suggested Books for Classroom Library

Gal, Susan. Into the Outdoors. Knopf, 2011. [ISBN 978-0-375-86958-7]

Hoban, Tana. Over, Under, Through and Other Spatial Concepts. Macmillan, 1973. [ISBN 978-0-329-70649-4] Currently out-of-print, this title may still be available in your school or public library.

Konrad, Maria Stewart. Getting There. Tundra, 2009. [ISBN 978-0-88776-867-5]

Rissman, Rebecca. How We Get Around. Heinemann Library, 2009. [ISBN 978-1-43292-275-7]

Rosen, Michael. We’re Going on a Bear Hunt. Illustrated by Helen Oxenbury. Simon/McElderry, 1989. [ISBN 978-0-689-50476-1]


Related Content