Ir al contenido principal

Ceramic Cups (lesson plan)

Resumen

This lesson will focus on how to sculpt a functional object in clay. By sculpting a cup, students will learn routines for working with clay and strategies to create a successful sculpted object. They will also learn that people long ago in Guatemala used similar cups to drink hot chocolate.

Niveles de grado
Pre-K
Conceptos
Función
Correlaciones de las normas de Carolina del Norte
Artes visuales
Desarrollo cognitivo
CD-4, CD-5
Estudios Sociales
Desarrollo cognitivo
CD-9
Ciencia
Desarrollo cognitivo
CD-15

Obras de arte relacionadas con esta lección

Objetivos de aprendizaje de los estudiantes

  1. Students will observe and identify the function and form of an item of everyday use and understand how it was made.
  2. Students will practice routines for working with clay and strategies to create a functional object.
Utilice las flechas izquierda y derecha para navegar entre las pestañas.

Actividades

Preparar

Cut up a baseball-size ball of clay for each student, plus extra for demonstration and for students who need more. It is helpful to place these balls on a baking sheet and cover with a damp towel until ready for use (like biscuits).

Configuración

Cut a placemat of butcher paper for each student (if not using Styrofoam plates).

Introducción/ Calentamiento

  1. Begin by asking: What did you drink this morning? What was the shape of the object you used to drink out of? Have them describe it with their hands. Share ceramic mugs for students to see and touch.
  2. Introduce the image of the Cylinder Vase, and ask students to use their imaginations and describe what kind of drink such a cup could hold and who might use it. Tell students it was made a very long time ago in Guatemala. (Possibly show students the location of Guatemala or Central America on a map.)
  3. Ask the students to guess the material the artist used to make the cup. Tell students that this is a cup used for drinking hot chocolate.
  4. Tell them the cup is made from clay. Clay is a material that comes from the earth (like thick mud). Tell students they are going to make their own cups using clay. Explain that these cups will be artworks, rather than something students will use to drink from.
  5. Ask students to describe the important parts of a cup. (Tall sides, bottom, no holes, strong edges.)
  6. Demonstrate how to make a cup, using the “pinch pot” method. First, make a ball from the clay. This ball should be a little smaller than the size of a baseball. Using your thumb, demonstrate poking a hole in the center of the ball of clay, while keeping your other fingers on the outside of the clay ball. Then you will use “pinching” fingers to gradually make the hole larger, which at the same time creates the walls of the cup. Emphasize that the cup needs a bottom, so they don’t want to poke all the way through the ball.
  7. Tell the students that first they need to warm up their hands (because you need very strong hands to sculpt with clay), and they also need to warm up their clay. Excuse students to their tables to begin working.

Procedimiento de la actividad de enfoque

  1. Students should have a piece of brown paper (butcher paper) or a Styrofoam plate with a piece of clay at their place.
  2. Students should roll or pat their clay into a ball and then poke their thumbs in to begin creating their cups, using the “pinch pot” method.
  3. Teachers should circulate and help students with their decisions and problem solving.
  4. When students are finished, teachers can write students’ names in marker on their butcher paper or Styrofoam plate and set it in a safe place to dry.

Cerrar

  1. Clean up: extra time should be allowed for hand washing.
  2. Gather class for closing routine, and invite the students to describe their cups using descriptive words. Encourage students to also describe how they sculpted their cups and what they would drink from them if they were ancient royalty.
  3. Pide a los alumnos que busquen el arte a su alrededor en casa y en la escuela.

Written by Angela Lombardi

Evaluaciones

1.   Assess student’s ability to create a functional cup through (1) observation and (2) discussion with student. Have students identify a cup’s parts and characteristics and compare those elements with the works they make.

2.   In closing discussion, ask students to identify similarities and differences between their cups and the Cylinder Vase and describe the properties of clay.

Recursos de la lección

Vocabulario

clay

Guatemala

Materiales

Air-dry clay (terra cotta color)

Butcher paper or Styrofoam plate

Different ceramic mugs or cups, handmade if possible

Actividades de extensión para profesores

  • Use various malleable sculpting materials at home or school including Play Doh, homemade play dough, purchased clay, self-hardening clay, etc. Use for creation of other functional pieces such as plates, utensils, pots, or bowls. Stamped tiles, cookie cutter shapes/ornaments can be used for added texture.
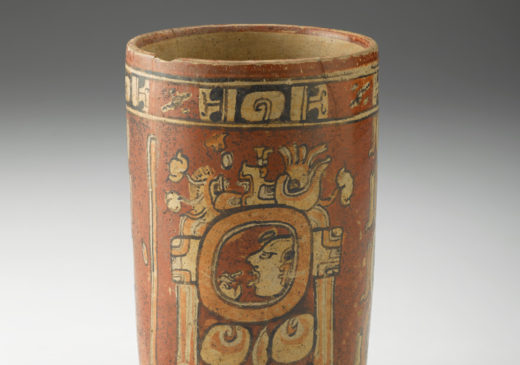
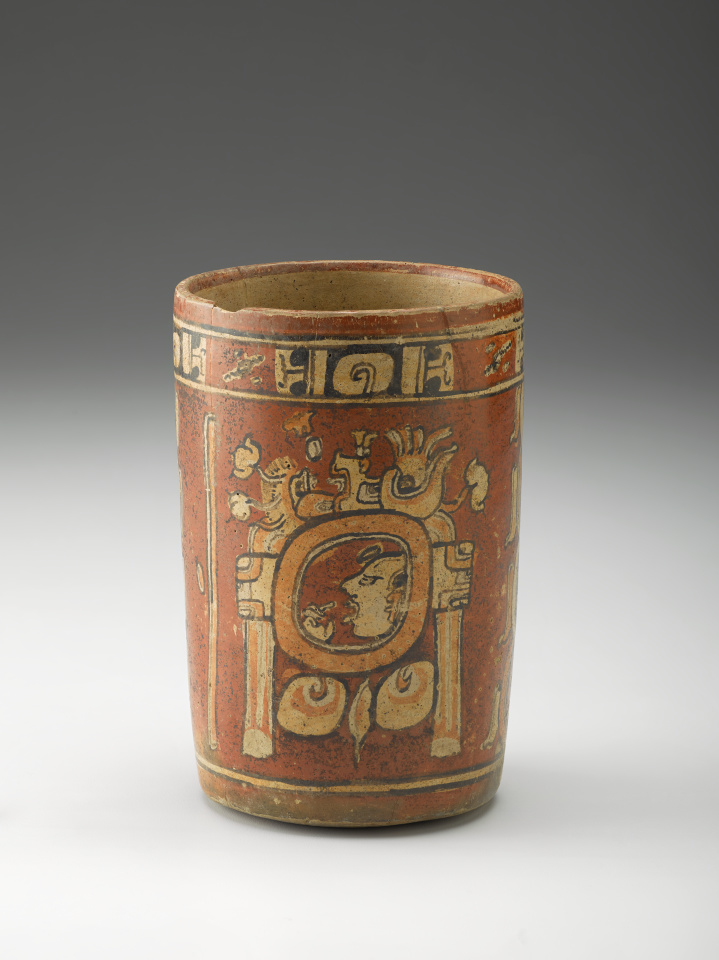
  • Once their artwork is dry, students can paint their cups during center time. One possibility is to have the image of Cylinder Vase available so students can see where the writing of the hieroglyphic date is located. Students might want to paint or write their names or make simple line designs as seen.

Actividades de extensión para las familias

  • Call attention to the materials used for functional cups, bowls, and plates at home. Notice if they have painted designs or plain colors. Are some made by hand? Is there a special cup you use for hot chocolate?

Libros sugeridos para la biblioteca del aula

Gibbons, Gail. The Pottery Place. Harcourt Childrens Books, 1987. [ISBN-13: 978-0152632656]

Hill, Laban Carrick. Dave the Potter: Artist, Poet, Slave. Little, Brown Books for Young Readers. [ISBN-13-978-0316107310]

Luxbacher, Irene. 1 2 3 I Can Sculpt! Kids Can Press, 2007. [ISBN 973-1-55453-038-0]


Contenido relacionado