1. Create a window pane foldable with four flaps for student notes on volcanoes.
2. On the outside of one flap of the foldable, ask students to draw what they know a volcano looks like (most students draw a “pointy” shaped mountain with red lava exploding out of it). Tell students to label this flap, “My Volcano.” Have students share drawings and discuss. Address the misconception that not all volcanoes are tall, exploding mountains.
3. Under the students’ volcano drawing on the inside of the foldable, have students define volcano, quiet eruption, and explosive eruption.
4. Have students count off by threes. Assign one type of volcano to each number (1—cinder cone, 2—shield volcano, 3—composite volcano).
5. Show students the video about the types of volcanoes. Have students take notes on the type of volcano that was assigned to their number.
6. After the video have students get into groups based on the type of volcano they took notes on. Students should work together, share notes, and use the textbook and/or Internet resources to describe their type of volcano. Students should become “experts” about their type of volcano. Students will finish by drawing a model of their volcano on the outside of the foldable and writing a description and any other facts under the flap.
7. Students will then get into groups of three. Each of the three students should be an “expert” on one type of volcano. Within the group, students will teach each other about their type of volcano. During this time, students should complete their foldables with drawings and facts.
8. Have students come back together as a class to compare and contrast the different types of volcanoes. Complete the Venn diagram.
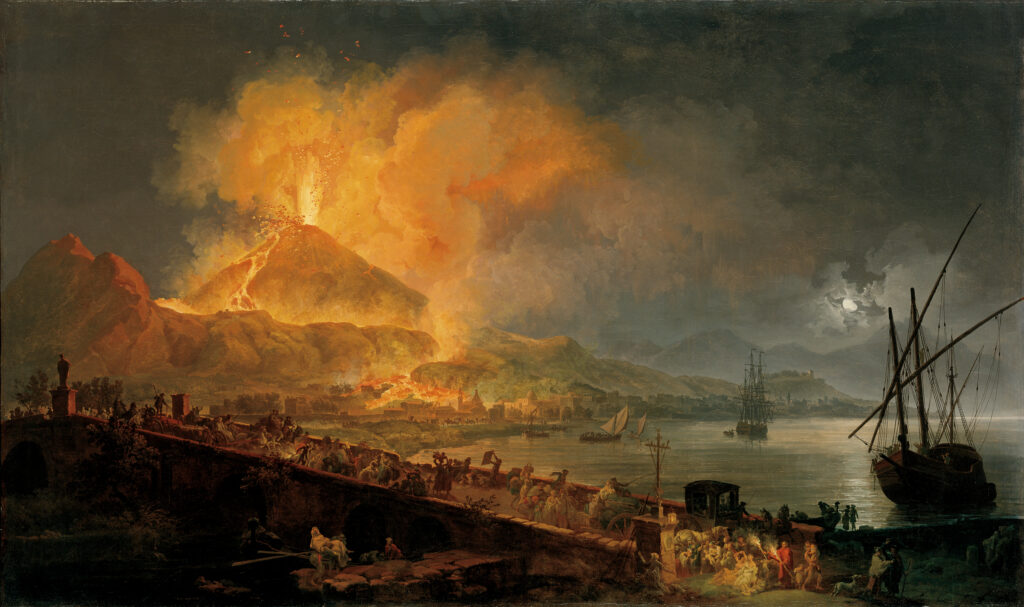
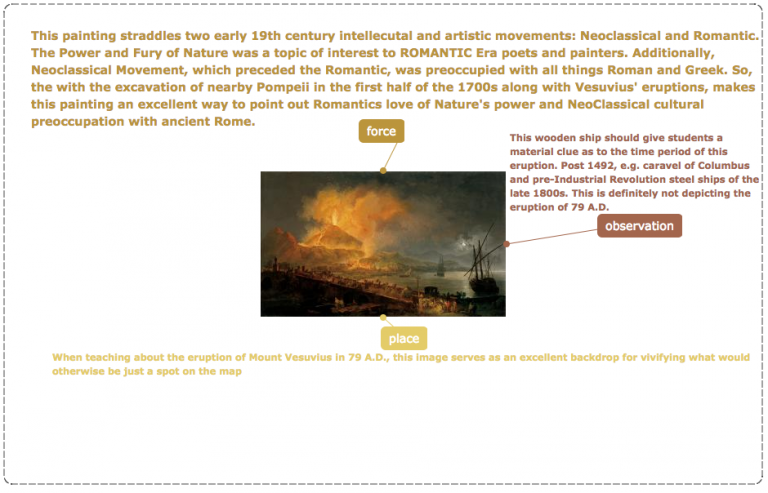
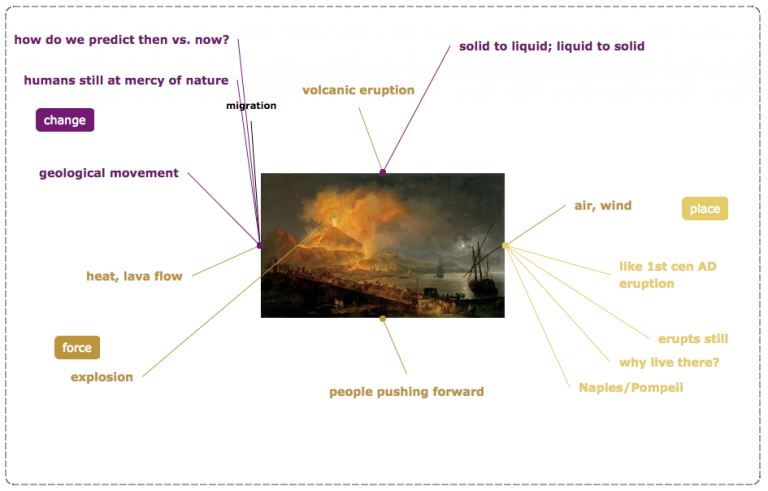
9. Project The Eruption of Mt. Vesuvius. Have students write ideas on paper and then discuss the painting with class. What is going on in the painting? What type of volcano do you think Mt. Vesuvius is? How does the artist show that it is this type of volcano? What impact does the volcano have on the environment and the people in that environment? Ask students to use evidence from the painting to answer the questions. What mood does this painting reflect? How do the colors in the painting reflect this mood? Why do you think the artist chose to convey this mood?
10. Discuss the art of using clay and review proper clay techniques (how to score, slip, slide, and smooth; adding texture; clay not being more than ½ inch thick). Clay vocabulary is reviewed and discussed.
11. Students work with clay to create one type of volcano. Students should use what they know about how that type of volcano looks and erupts to add texture and details to their sculpture while using proper clay techniques. While the students are creating their volcanoes, show the PowerPoint presentation of photos of different types of volcanoes for inspiration.
12. Once the clay models have dried, have students use paint to add color to their models.
13. After the model has been completed, the students should write a reflection about their project. Questions include: What type of volcano did you create? How does your model show that it represents that type of volcano? What tools did you use and processes did you go through to help create your volcano? How did you add eruptions or texture to your volcano? What did you find difficult about working with clay? How did you use color to help enhance your volcano?
14. Have students review their sculpture, analysis of The Eruption of Mt. Vesuvius, and reflection to complete the self-assessment on the rubric.
Written by Jennifer Rogers, Science Teacher.