Textile Weaving (lesson plan)

Abstract

Artists will explore the process of weaving through observation and movement. They will create a woven fabric square using a variety of textiles and “found” materials. Artists’ fabric weavings will be linked together to create a collaborative fabric wall hanging.
Grade Levels
Pre-K
Subject Areas
Dance, Math, Visual Arts
NC Standards Correlations
Visual Arts
Cognitive Development
CD-4, CD-5
Math
Cognitive Development
CD-4, CD-5
Dance
Cognitive Development
CD-5

Artwork Related to this Lesson

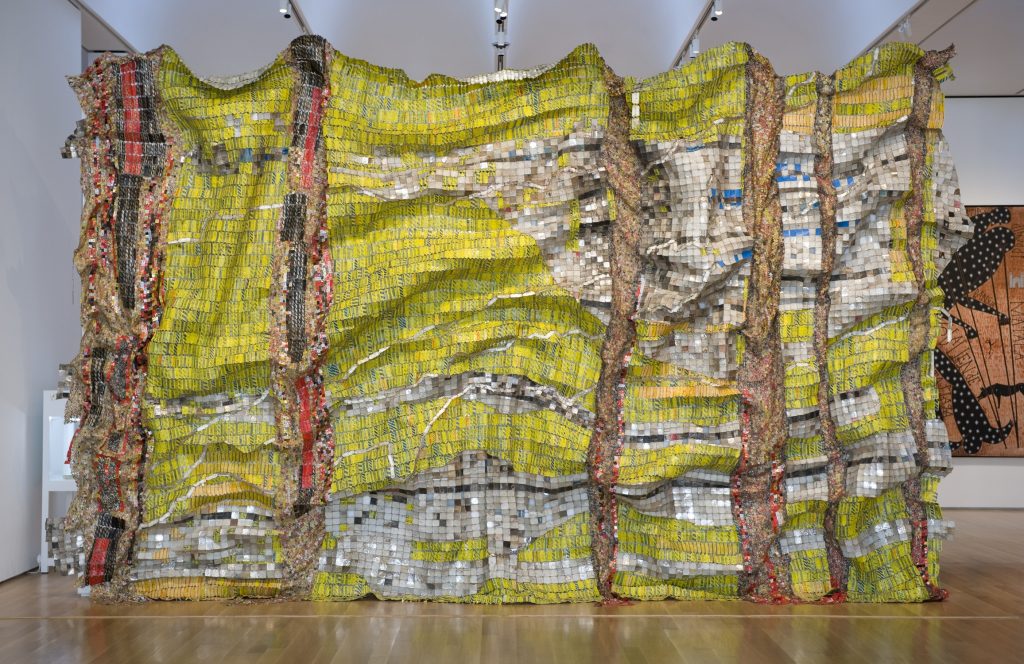
  • Lines That Link Humanity

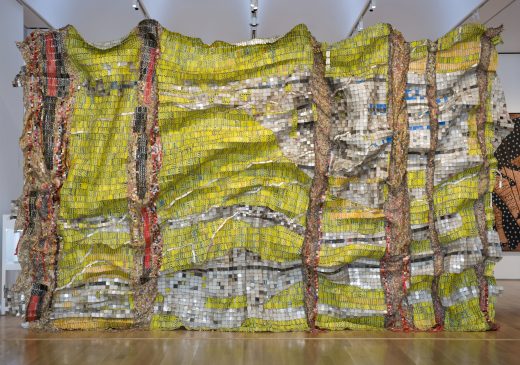
    Lines That Link Humanity, by El Anatsui

    learn more

Student Learning Objectives

  1. Students will explore and identify textile weaving.
  2. Students will strengthen their understanding of overlapping and over/under as it applies to weaving.
  3. Students will learn how artists can use found objects/materials in their art.
  4. Students will apply knowledge of weaving through art making and movement.
Use left and right arrows to navigate between tabs.

Activities

Preparation

  1. Make slits in felt by folding each piece in half and cutting – starting from the fold – stopping the cut about a ½ inch away from the side. Continue in this manner, making around 6-8 slits in felt.
  2. Tear or cut weaving materials into strips, if necessary. Gather a wide variety of weaving materials and create strips of various widths.
  3. Find or make 13, 6 ft. long strips of ribbon, yarn, or fabric to be used in students movement exercise.

Introduction/ Warm-Up

  1. Ask the students if they have ever used a Rainbow Loom or received something made with such a loom. Show examples of these objects.
  2. Ask students if they can think of anything else in their homes or schools that might have been woven. Give students time to respond then show them examples such as potholders, rugs, or clothing. Ask, Can anyone guess how these were made? (overlapping materials) Does anyone see any patterns in these weavings?
  3. Say to artists: “Let’s see if we can understand the way that weaving works. Let’s try to weave something together.”
  4. Have five students stand a few feet across from five other students. Give each of the five pairs one end of a ribbon or yarn to hold on to. Tell them to keep the yarn pulled tight. Call them the “loom”. Next, give the remaining students a long piece of yarn, fabric or string. Have one adult hold all ends of the yarn, fabric or string in his/her hands. Then, going one at a time, instruct each student to “weave” his or her material through the “loom” going over/under/over/under each piece of ribbon or thread. They can move their bodies over/under each ribbon or just move their material over and under. After each artist comes to the end of the “loom” another artist takes his/her turn to weave. Encourage students to say “over, under, over, under” as the students are “weaving.”
  5. Observe and discuss the movement activity and the outcome of the class’s large weaving.
  6. Explain that sometimes objects are woven to create something that is useful (like a rug, a basket or a blanket); sometimes objects are woven to create art (like a tapestry); and, most often, objects are woven to be both useful and artistic.
  7.  Introduce the El Anatsui image. Ask students what they see in the image. Guide questions toward an identification of materials as well as an understanding of how the piece was made.

Focus Activity Procedure

  1. Describe art activity by showing artists the teacher products and saying, “Today, we are going to create a weaving using many different kinds of materials, including some ‘found materials’ just like El Anatsui used.”
  2. Demonstrate how to weave using the felt square. Reinforce the over/under technique by saying “Over, under, over, under” as you work. Have students say it with you. Demonstrate using a variety of weaving materials.
  3. Excuse artists to their seats to work.
  4. While artists are weaving, walk around to check for understanding or repeat the demonstration, if needed.
  5. Once artists are finished, place adhesive (tape or contact paper) on the back of the weaving so the fabric strips stay in place. Names may be written on the tape or discretely on the front using permanent marker.

Closing

  1. Clean up.
  2. Gather class for closing routine and conversation. Gather all weavings onto one table and observe the pieces en masse.
  3. Invite students to point to a fellow artist’s weaving and share what they observe in the piece. Ask, What kinds of materials can you find? Do we see any found materials in this weaving? What does the overall piece remind you of? How did the artist use over/under technique to create a weaving that has pattern?
  4. Ask students to look for art all around them at home and at school.

Written by Amy Keenan Amago

Assessments

  1. Assess student understanding of weaving process by observing students during the “over/under” verbal call and response, as well as during the weaving movement exercise.
  2. Assess listening skills and understanding of El Anatsui piece by asking recall questions about the artwork.
  3. Observe student work in process and in completion to assess if students have understood and successfully employed the process of weaving.
  4. During share-back at the end of the project, assess understanding of concepts presented in class. Listen for use of new vocabulary, understanding of over/under technique and ideas presented in discussion of El Anatsui piece.

Lesson Resources

Vocabulary

weave

pattern

overlap

over/under

textile/fabric

found objects

Materials

  • One felt weaving square per artist plus one to use during demonstration (Cut felt can be between 6” X 6” and 8” X 8” square. Just make sure they are all the same size.)
  • A variety of materials for weaving, such as: torn up bed sheets, ribbon, strips of old tee shirts, felt, shoelaces, cellophane, wallpaper samples, raffia, paper, wire, fabric strips, yarn, etc.
  • Masking tape, packaging tape or contact paper to apply to back of weavings
  • Black permanent marker for labeling weavings
  • Loom and woven objects such as potholders, rug, clothing.

Extension Activities for Teachers

• Invite students to use construction paper or paper from the recycling bin to create a paper weaving.

Extension Activities for Families

• With your families, identify objects at home that were woven (i.e. rugs, tapestries, pot holders, etc.)

• Tear up an old pillowcase or tee shirt or use rubber bands or strips of newspapers to make a found object weaving at home.

Suggested Books for Classroom Library

Barnett, Mac. Extra Yarn. Balzer and Bray, 2012. [ISBN 978-0-06195-338-5]

Blood, Charles. The Goat in the Rug. Aladdin, 1990. [ISBN 978-0-68971-418-4]

Castaneda, Omar S. Abuela’s Weave. Lee and Low Books, 1995. [ISBN 978-1-88000-020-5]

Churchill, Ginger. Wild Rose’s Weaving. Tanglewood Press, 2011. [ISBN 978-1-93371-856-9]

dePaola, Tomie. Charlie Needs a New Cloak. Aladdin, 1982. [ISBN 978-0-67166-467-1]

Lyon, George Ella. Weaving the Rainbow. Simon and Schuster, 2004. [ISBN 978-0-68985-169-8]


Related Content